If you have a home computer with a massive GPU and CPU, or a slick gaming laptop with powerful hardware, you can put it to work mining Bitcoin when you are not using it. This guide presents the process in a clear structure based on 10 easy steps, along with a few additional notes shared by the hobbyist miner.
The idea is simple: when you are in class, at work, on vacation, or sleeping, your PC can be mining. According to the walkthrough, you can set up your computer to mine Bitcoin in less than 10 minutes.
About the Hobbyist Miner
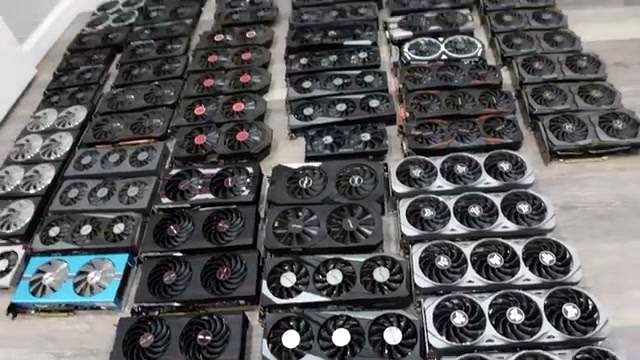
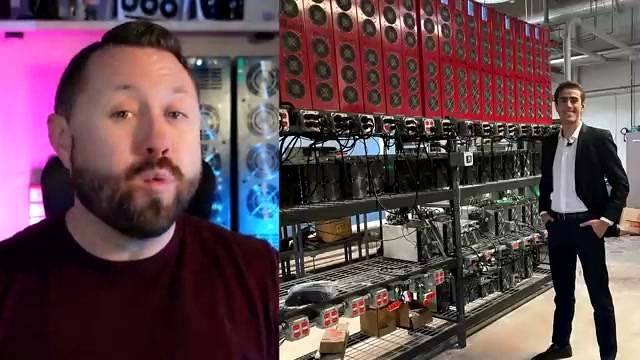
The hobbyist miner says he started mining 3 years ago with two MSI 970s. He later grew to 100 graphics cards and over 30 Bitcoin miners, and says he loves crypto mining.
Sponsor Mentions in the Video
Endless Mining
A special shout out is given to the team at Endless Mining for sponsoring the video. The hobbyist miner says he has gotten to know Augustine very well over the last few years and met him in person at Mining Disrupt 2023.
For people looking to buy their next Bitcoin or Casa miner, he recommends reaching out to Augustine. He mentions pricing on s21s, s19 K pros, and the new ks5. He also says Endless Mining offers hosting in the United States and shares a promo code, RPM face reveal, for a discount at checkout.
Quantum Expeditions
The video also states that it is sponsored by Quantum Expeditions. It says Bitcoin mining can be profitable, but doing it yourself can be complicated and risky because of unpredictable cost, equipment failures, and high energy cost.
Quantum Expeditions is presented as making it easy for retail investors to participate in large-scale Bitcoin mining without leaving home. The video also says people can join a community, contribute knowledge and feedback, or learn from others. It mentions a limited-time opportunity to invest directly in the company through an exclusive regulation CF crowdfund and states that Quantum Expeditions completed its first deployment of Bitcoin miners 3 weeks ahead of schedule.
The 10-Step Setup Process

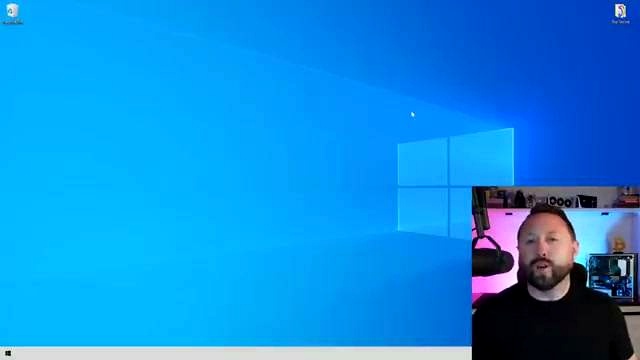
Step 1: Install Windows 10 or Windows 11
You will want Windows 10 or Windows 11 installed on the computer you plan to use to earn Bitcoin. The video mentions that if someone needs help doing this, there is a link to another creator’s step-by-step installation video.
Step 2: Make Sure You Are Connected to the Internet
You can be connected by wired ethernet directly to your router or by wireless. As long as the connection is stable, you are good to go. Mining does not use a lot of bandwidth, and the walkthrough says five down and five up is enough.
Step 3: Disable Hibernate and Screen Saver
This step is important because you do not want your computer falling asleep and disabling resources needed for mining.
- Press the Windows key in the bottom left corner.
- Type screen saver.
- Click the screen saver settings.
- Set the screen saver option to None.
- Go to change power settings.
- Make sure everything is set to never.
- Save changes, click apply, and click okay.
The reason given is simple: you do not want the computer going into hibernate or sleep mode 30 minutes into mining and cutting into Bitcoin profits.
Step 4: Close All Programs and Browsers
Before mining, close all programs and browsers because they take up resources and cut into profits. The advice is to have absolutely nothing open at the time of mining.
- No Photoshop
- No Paint
- No browsers with lots of content and tabs open
Step 5: Go to NiceHash and Sign Up
Open your favorite internet browser and go to NiceHash’s website. Once there, click Get Started in the upper right-hand corner and complete the signup process.
Step 6: Download NiceHash Miner
After creating an account and logging in to the NiceHash dashboard:
- Click Mining in the upper left-hand corner.
- Click Download Miner in the upper right-hand corner.
- Choose the second option, the one labeled NiceHash Miner with the white and orange logo.
- Download the miner.
During this process, NiceHash provides a wallet address. The walkthrough says to copy that address.
Step 7: Install the Software
Once the download is complete, launch the installer. Read through the terms of service if you want, click I agree, click Next, and then click Finish. This launches the actual mining software.
Step 8: Start Mining and Benchmark Your Devices
After launching NiceHash Miner:
- Accept the terms of service.
- Accept the disclaimer.
- Select your language and click next.
- Add your mining address.
The walkthrough says that most likely you will choose to enter the NiceHash mining address manually. Since you copied it earlier, you can paste it with Ctrl + V and then hit save.
The software may take a few minutes to test things. If Windows pop-ups appear during installation, the advice is not to be concerned, because they relate to miners that run inside the NiceHash software. The guide says to click I agree for both and then restart the NiceHash software when prompted.
Once the software is ready, it detects one GPU and one CPU. To begin, click the play button. If another window appears, click allow access.
By default, the GPU is enabled. If you also want to mine with your CPU, go to devices and check the box for CPU. The software will then benchmark both devices.
The video says benchmarking could take a few minutes or a few hours, and recommends letting it run as long as possible to determine the best miner for your CPU and GPU and the most profitable setup.
Important Notes While Benchmarking or Mining
- Do not try to use your computer while benchmarking or mining.
- Mining tries to use 100% of your GPU and CPU resources.
- Trying to play games, check email, or return messages during mining is described as not working out well.
- Your computer may seem goofy, locked up, and super sluggish because it is using all the resources.
Laptop Cooling Tip
If you are mining with a laptop, the recommendation is to flip it over on its side. The reason given is that laptop fans spin up quickly to cool the CPU and GPU, and when the laptop is face down in the normal position, airflow is restricted. Putting it up on its side is said to do a great job of helping cool the equipment.
Step 9: Get Your True Bitcoin Wallet Address
This can be done on another computer or on your phone using the NiceHash app. The goal is to get your true Bitcoin wallet address, not just the one in NiceHash.
The hobbyist miner says he loves the Tangem wallet and highly recommends it. He says there is a link below as well as a full step-by-step tutorial video on how to use it.
On the NiceHash dashboard, click Mining. You will see your miner there, and it may be benchmarking. In the middle of the screen, there is an unpaid mining balance. This is the balance earned from mining. The video says it may take an hour or two before it starts updating.
There is also a countdown timer on the right. When the timer reaches zero, the unpaid balance moves to your Bitcoin wallet balance on NiceHash. The walkthrough says this timer is about every 3 hours, or maybe 2 and a half to 3 hours.
After setting up a separate Bitcoin wallet that you own outright, you can go to the dropdown arrow at the top of the NiceHash website, click withdraw, and move your funds from NiceHash directly to your Bitcoin wallet.
Step 10: You Are Mining Bitcoin
At this point, you are now mining Bitcoin with your computer.
Optional Next Step: Join the Community

The hobbyist miner also mentions a step 11 for anyone who wants to talk more about mining, hardware, or GPU rigs. He invites viewers to join the hobbyist miner Discord community through the link below and says he would love to talk more one-on-one.
Summary
The walkthrough is presented as 10 easy steps to earn Bitcoin with your computer when it is not in use. It focuses on preparing Windows, making sure the internet connection is stable, preventing sleep and screen saver interruptions, closing all programs, installing NiceHash Miner, benchmarking the hardware, and then sending mined funds to a separate Bitcoin wallet.
FAQ
- Can I use a home computer or gaming laptop for this?
Yes. The walkthrough specifically mentions a home computer with a massive GPU and CPU or a gaming laptop with powerful hardware.
- How long does setup take?
The guide says you can set up your PC to mine Bitcoin in less than 10 minutes.
- Do I need a lot of internet bandwidth?
No. The walkthrough says mining does not use a lot of bandwidth and that five down and five up is enough.
- Why should I disable screen saver and hibernate?
Because you do not want the computer to fall asleep or go into hibernate or sleep mode while mining, as that can cut into Bitcoin profits.
- Should I keep programs and browser tabs open while mining?
No. The recommendation is to close everything so those programs do not use resources and reduce profits.
- Can I mine with both GPU and CPU?
Yes. The GPU is enabled by default, and you can also enable the CPU by checking the CPU box in devices.
- Can I use my computer while it is mining?
The guide strongly recommends not doing that. It says mining tries to use 100% of the GPU and CPU, and the computer may become sluggish or seem locked up.
- What should I do if I am mining with a laptop?
The recommendation is to place the laptop on its side to improve airflow and help cool the equipment.
- What is the unpaid mining balance in NiceHash?
It is the balance earned from mining. The walkthrough says it may take an hour or two to start updating.
- How do I move funds to my own Bitcoin wallet?
After setting up a separate wallet that you own outright, go to the dropdown on the NiceHash website, click withdraw, and send the funds to your Bitcoin wallet.
Original Source

Omar Al-Sharif lives and works in the UAE and is involved in the blockchain technology industry. He writes articles on Bitcoin and digital assets as a personal passion, explaining complex topics in simple and understandable language.