After setting up a Bitcoin Cash node, the next step is configuring a mining rig within the SHA-256 protocol to mine Bitcoin Cash solo. The process is straightforward, and the main reason for choosing Bitcoin Cash is the much higher chance of hitting a block compared to Bitcoin.
In solo mining, rewards only come if a block is found. Because of that, understanding the odds and setting up the rig correctly are both essential before allocating computing power.
Why Mine Bitcoin Cash Solo

A practical way to compare solo mining chances is by using solochance.org, where it is possible to calculate the probability of hitting a block. In solo mining, there is no reward without finding a block, so probability matters a lot.
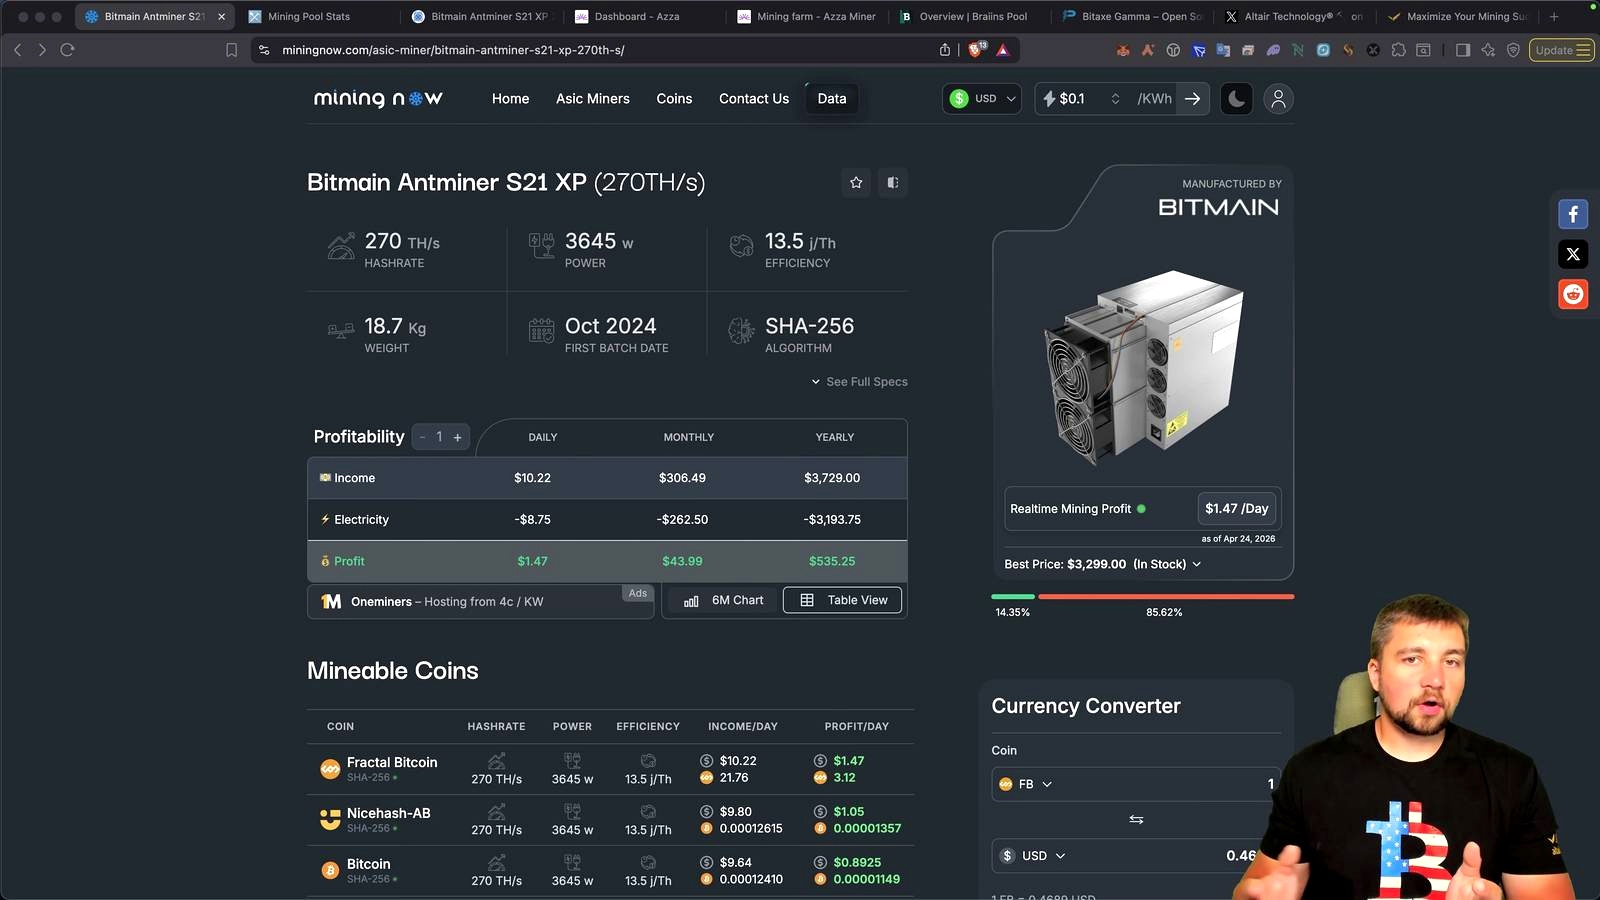
With Bitcoin, the odds can be extremely low. Using an S19 with around 80 terahash of computing power means a 1 in 102,000 chance per day. In a year, that becomes a 1 in 285 chance, which still leaves the goal very far away.
With Bitcoin Cash, using the same 80 terahash already owned, the chance improves to 1 in 656 per day. In a year, that becomes a 1 in 2 chance. The rewards are smaller than a Bitcoin block, but the odds are much higher, which is why Bitcoin Cash becomes an attractive option for solo mining.
Example of Solo Mining Odds
- Rented pentahash: 1 in 8,000 chance per day
- S19 at around 80 terahash on Bitcoin: 1 in 102,000 chance per day
- S19 at around 80 terahash on Bitcoin Cash: 1 in 656 chance per day
- Bitcoin Cash in a year with 80 terahash: 1 in 2 chance
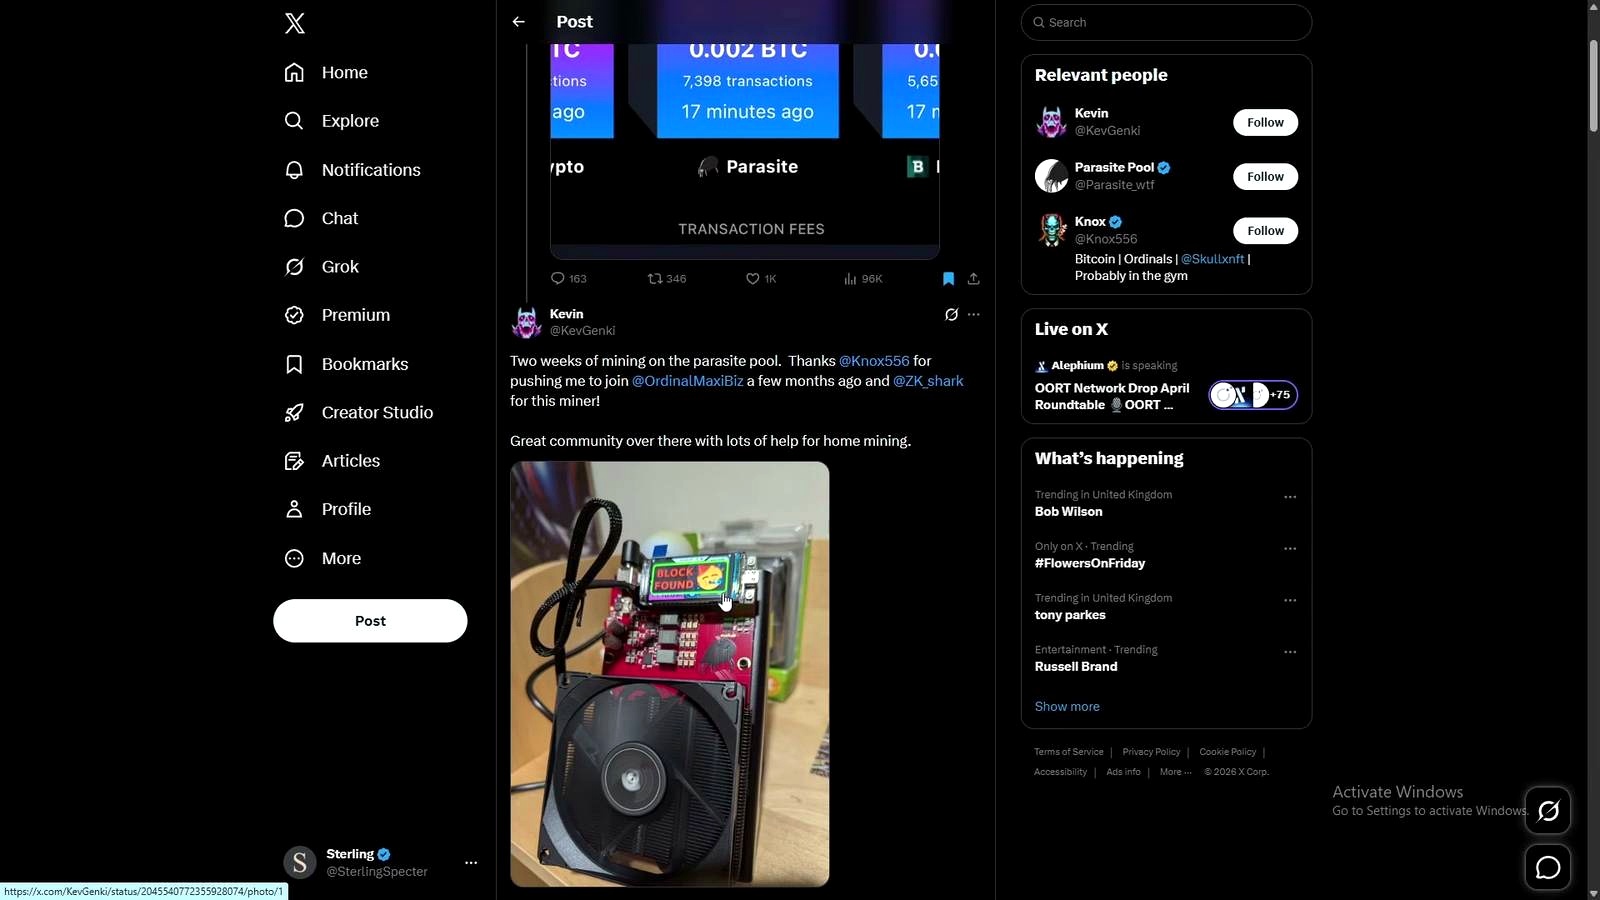
Recent Solo Mining Example
On February 24th, a miner found a solo block by renting Brains computing power. Brains manufactures the mining machine shown and also rents computing power. In that case, someone rented a pentahash for 75 and found a block, which was described as a lucky move.
Reward Perspective

Up to 2028, there would be a chance to hit a Bitcoin Cash block, and 17 on average was mentioned. Up to 2140, the average mentioned was 63.4 bitcoins. For the present moment, a Bitcoin block was described as loaded with 315 bh, or 171725.
The important point is simple: the reward for Bitcoin Cash is smaller than the reward for Bitcoin, but the probability of success is far better for solo mining.
What You Need Before Configuration
Before starting the setup, the node must already be operational. It must be showing the network hashrate and the difficulty. A wallet is also needed to receive Bitcoin Cash.
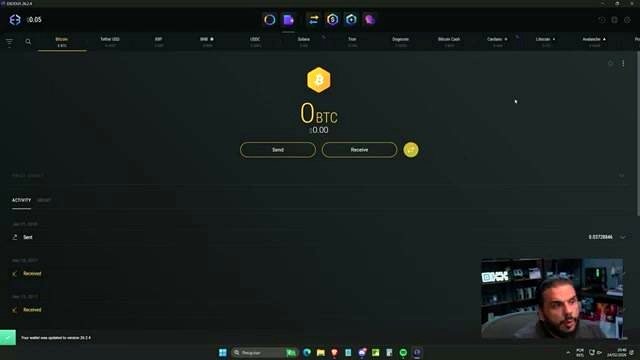
Recommended Wallet
The recommended wallet is Exodus. It was described as a fantastic wallet and a program that runs on the computer. In the wallet, it is necessary to open Bitcoin Cash, choose receive, and copy the Bitcoin Cash address.
Bitcoin Cash Solo Mining Setup
Once the node is running, open the Bitcoin Cash solo section. At first, the pool status values are zero because no computing power has been allocated yet. The dashboard in the blocks area will only show something if a block is correctly identified.
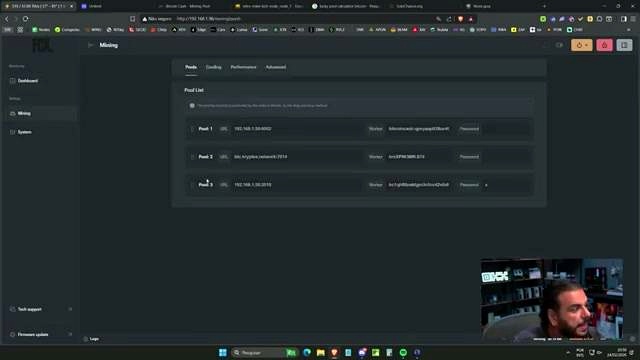
Pool Creation
Go to the mining machine interface and create a third pool. In the example, there were already three pools:
- One created on Criptex to test normal mining
- One solo mining operation on the user’s own node
- A new pool for Bitcoin Cash solo mining
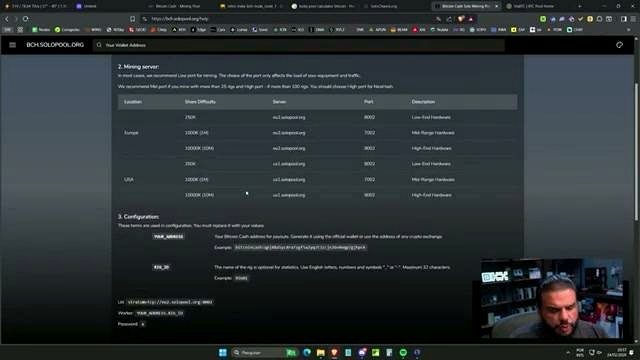
Pool Address
Copy the entire mining pool address, starting with the exact TCP port, and paste it into the pool URL field.
Worker Format
For Bitcoin Cash, the worker field must include bitcoincash: before the wallet address. After that, paste the wallet address and give the worker a name, such as S19.
The full line should be structured like this:
- bitcoincash:
- full wallet address
- worker name, such as S19
A format warning may appear, but it was stated that this is not a problem. No password is required, so the next step is simply to save.
Fixing the Offline Status

After saving, the miner may appear offline. In the example, this happened because Umbrel was being used. The solution was to change the connection from the Umbrel address to the local IP address.
Local IP Example
The local network IP used in the example was 192.168.1.50, with different ports shown as 2018 and 6002. After replacing the address and saving again, the miner came online.
Activating and Prioritizing the Pool
Once the connection is live, activate the pool. It was also set as priority so that if the machine restarts or anything happens, this pool becomes the first one to start.
The fallback logic was organized like this:
- Primary pool starts first
- Regular Bitcoin mining can remain as another option
- If pool one does not work and pool two does not work, then move to pool three
This setup helps if the power goes out, the machine restarts, or the connection is interrupted during travel or another issue.
Monitoring the Mining Operation
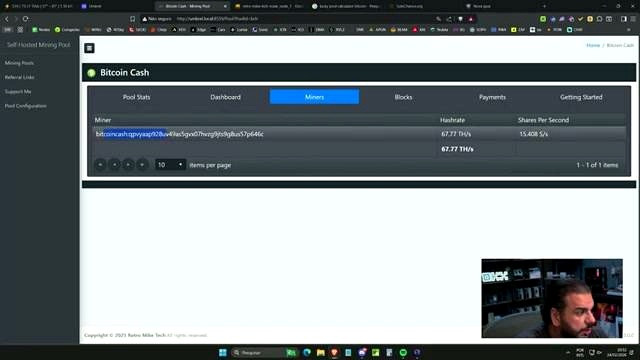
After activation, the pool stats should begin showing the worker name, such as S19, in the computing power field. Returning to the miner interface should show the mining operation running and the computing power rising.
In the example, it had already climbed to 44 and 445 GB, and the network difficulty was shown at level 7. From that point on, the task is simply to keep watching and see whether a block is found.
Why Use Your Own Node
Using a personal node was presented as a valid choice. It allows mining directly on your own node and avoids relying entirely on external services. It was also said that maintaining a single node does not consume that much energy.
There are several protocols that can be used, including open-source and BTC-based protocols. There are also miners where it is possible to click on T Miners, go to Quickst, and get the address. Even so, bringing mining directly into your own node was described as worthwhile and useful for learning.
Other Solo Mining Possibilities
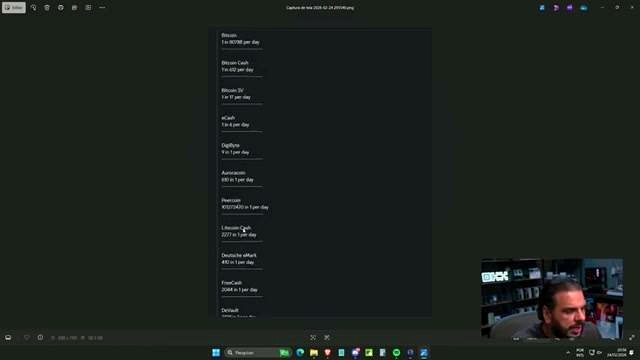
The project does not end with Bitcoin and Bitcoin Cash. Several solo mining operations can still be tested. Examples mentioned include:
- Bitcoin
- Bitcoin Cash
- Bitcoin SV
- Casash
- Digibyte
- Aurora Coin
- Percoin
- Litecoin Cash
Not all of them pay a fortune, but Bitcoin Cash was described as likely the second most popular option among solo miners.
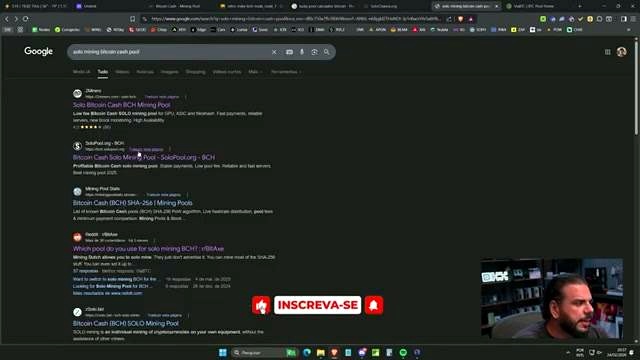
Choosing a Pool Carefully
Some pool listings can be found on solopools.org. It was stated that there was no certainty about whether all of them are scams or not. The only one specifically known and used in the example was Via BTC, but the issue described there was dependence on their service, just as dependence also exists with Criptex.
That is another reason why running your own node and using your own setup can be appealing.
FAQ
Why choose Bitcoin Cash instead of Bitcoin for solo mining?
Because the chances of hitting a block are much higher. With around 80 terahash, Bitcoin was described as 1 in 102,000 per day, while Bitcoin Cash was described as 1 in 656 per day.
What wallet was recommended for receiving Bitcoin Cash?
Exodus was recommended as the wallet for receiving Bitcoin Cash.
Does solo mining always pay rewards?
No. In solo mining, rewards only come if a block is found.
What must the node show before configuration starts?
The node must already be operational and show the network hashrate and the difficulty.
How should the Bitcoin Cash worker field be written?
The worker field should include bitcoincash: first, followed by the wallet address and a worker name such as S19.
Is a password required for this pool setup?
No. It was stated that there is no password, and the setup only requires saving the configuration.
What should be done if the miner appears offline?
Change the connection to the local IP address instead of the Umbrel address, then save again.
What happens after the pool is activated?
The worker should begin appearing in the pool stats, the mining operation should show computing power, and then it becomes a matter of watching to see whether a block is hit.
Video Source

John Burnell focuses on Bitcoin infrastructure, wallet security and blockchain technology. He writes educational articles explaining how Bitcoin works and how the technology evolves.